Utilizing menus on your WordPress site can allow site users to navigate to posts and pages quickly and easily.
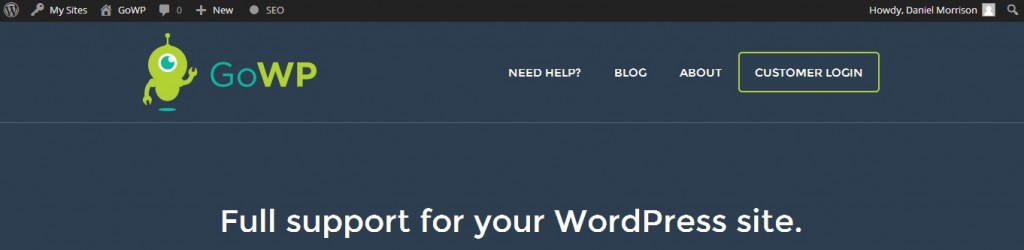
As you first start adding information to your WordPress site, you will notice that if you were to add a new page, then that page will automatically be displayed on your menu. The menu, as seen in Figure 1, is the set of navigation tabs that are typically displayed above all posts and pages on your site (depending on your WordPress site’s theme).
To customize what is displayed on the menu, locate the appearance tab on the left sidebar of your WordPress dashboard. As you scroll over the appearance tab, a drop-down menu will appear with several customization options. Click the “menu” option.

From here, click on “create a new menu”. You will then be asked to give your menu a name, but note that the name of your menu will not be visible to your site’s users, so any title will do. After you have given your menu a name, it is time to add the menu items that will be displayed on your site. The three types of menu items that can be displayed on your site are:
- Pages
- Links
- and Categories
Page
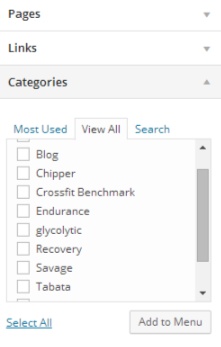
To add a page to your menu, simply select the page(s) that you wish to display from either the “most used” tab, which will show a list of all of your most popularly used pages,or the “view all” tab, which will show an entire list of your published pages and subpages. If you cannot find a page that you are looking for there is also a “search” tab help as needed. Then click “Add to Menu” and the selected pages will be added to the “Menu Structure” field.
A page is a static element, meaning that it is content that does not change or update frequently. If you are looking more for a tab that directs you to a blog page or page with a thread of posts, please see Categories below. Pages are popularly added to a site’s menu to direct users to a single page of information that will not be changed much, if at all. Examples include GoWP’s “About” page, as well as the “Need Help?” page!
Link
If you would like to add a tab to your site that links out to another website, use the “Link” section. Adding a link to your site’s menu can be very useful if you have a sister website, a partnership with another business, or if you want to give your users quick access to a resource.
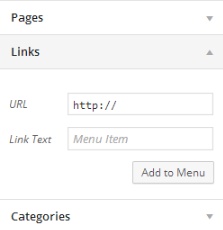
If you would like to add a link to your site’s menu, it is as simple as copy and pasting the desired link and giving it a title to be displayed alongside the other menu items. Then click “Add to Menu” and your link will be added to the “Menu Structure” field.
Category
Categories can be added to your site’s menu in the same way that pages are, the difference being that categories give you the ability to create a thread of posts rather than just having a page of information. A great example is the tab titled “Blog” that you clicked on to get to a list of our recent blog posts!
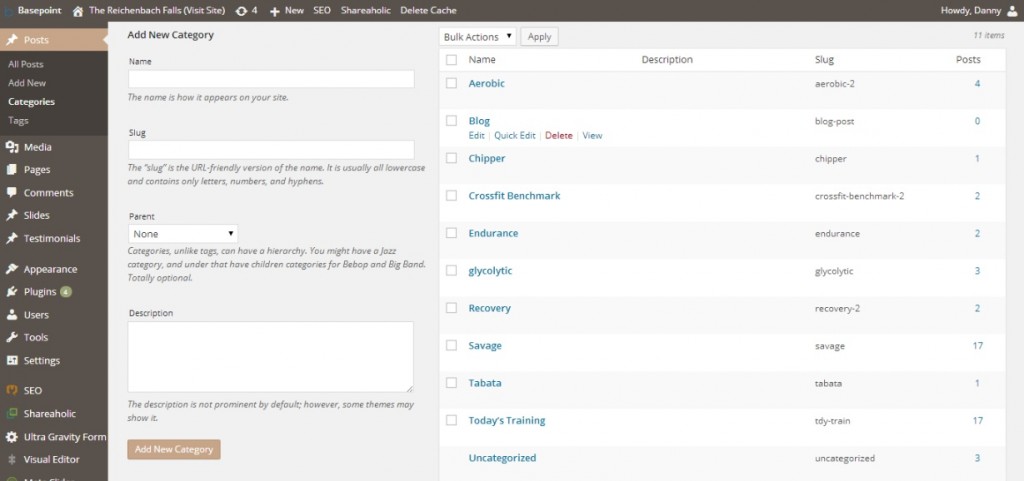
To organize your posts by category, you will first need to create your category or categories. For example, if you want to make a blog page, you will first need to go to the “Categories” page in the “Post” drop-down menu of your dashboard and create a category. There you will be able to give your new category a name (which will be displayed on the menu) and a slug, or url-friendly version of the category’s name. Then return to the “Menu” page of your dashboard and add your new category to your new menu. Now whenever you add a category to a post, that post will be displayed in the post thread that your users can access through the new menu tab.
Organizing your menu
The order of your menu items is very easy to customize. In the “Menu Structure” field, simply drag and drop your menu item to the order in which you would like them to be displayed on your menu. It’s as simple as that!
Sub-items
Sub-items are displayed on the menu as drop-down lists when a user scrolls over a menu tab. The use of sub-items can give your site an extra level of navigational ease and helps greatly with organizing your site information in a user-friendly manner.
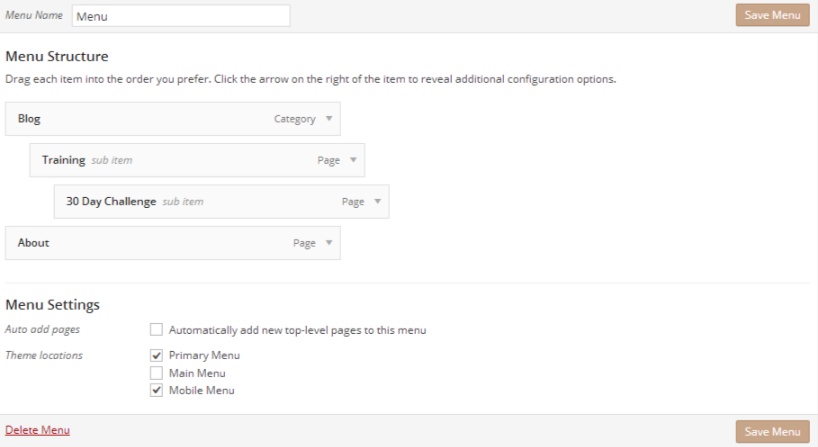
To create a sub-item, all you have to do is add the desired page, link, or category to the “Menu Structure” field, drag and drop your under whichever menu item you wish to locate the sub-item, and drag the item slightly to the right so that it “locks in” a notch to the right,so to speak (See Figure 7). This now means that the item will be displayed in the drop-down menu of the chosen menu item.
Menu display
Depending on your theme, you can assign a menu to be displayed in certain areas of your site. For instance, one menu can be assigned to the Mobile Menu (which is displayed on mobile devices), while another can be assigned as the Main Menu above all of your site’s posts and pages.
Using menus allows for awesome navigation throughout your site’s content and can even add to the overall look of your WordPress website.


Thank you for this. I have just started blogging and finding my voice is my main goal for the coming months.
BloggingRex